

Blacklight photography uses wavelengths shorter than the visible spectrum (ultraviolet) to illuminate the subject. The results can be pretty awesome! With body paints and a standard camera you can get cool effects. This guide is slightly different, it’s about true UV photography where you not only illuminate the source with short wavelengths but also collect only those short wavelengths back to the camera.
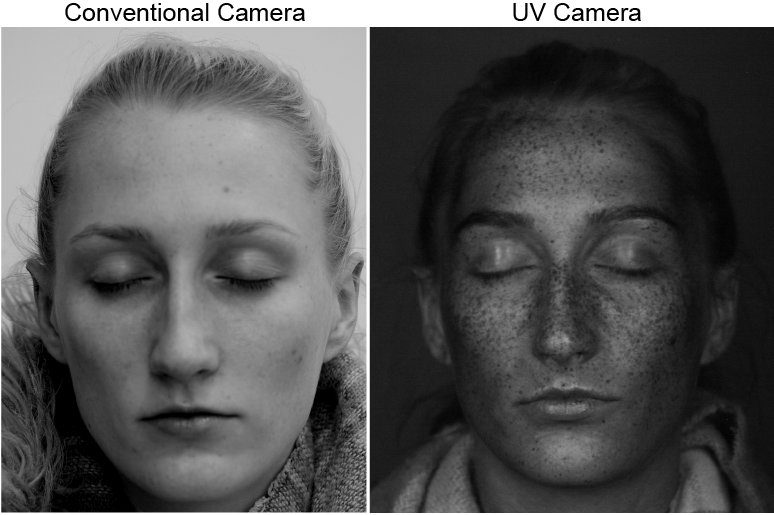
Over the last few years we have been using blacklights and UV sensitive cameras in our research studies, in outreach events (museum, hospital) and on a couple of TV shows (ITV, BBC) in order to examine and inform the public about sunscreen application. UV images are stunning too but in a different way, they can reveal what isn’t visible to the naked eye.
If you are just looking for blacklight recommendations… these are what we use LED blacklights: KAM-UV bar. More details on set up below.
Over that time we have experimented with a few different things and I am now pretty happy with the quality we are consistently able to achieve. This page gathers together some of the information for anyone who fancies setting up their own systems for research or just to take super cool pics!
The camera and lenses
The camera body we started with was Canon DSLR (this is an amazon affiliate link but we actually used a second-hand Canon 400D)
The camera was modified to only see UV by sending it off to lifepixel . They provide a service where they replace the internal hot mirror with a UV band pass filter. Conversion currently costs $475 dollars.
Note that if you do this you won’t be able to use the camera for any conventional photography thereafter. Lifepixel also sell ready converted cameras but these can be quite expensive.

We equipped this camera with a 60mm EF-S macro lens. We did try out a few others and got reasonable results with a significantly cheaper EF 50mm 1.8 STM lens that I already had, but we needed longer exposures with that lens.
An important point with the lens choice is that it needs be transmit a large amount of the UV light or you will really struggle, so if you are trying to decide where to spend your money, the lens is the way to go!
Note that the conversion in the camera body means that your viewfinder and sensor focal points will be off so you need to use manual focus and find a point where you are just beyond the normal focus point to get the subject in focus on the sensor. Sounds fiddly but you get used to it quite quickly!
Light source

We played around a little bit here…
On bright sunny days you are able to shoot outside using ambient UV light. Expect to require long exposures and high ISO settings if, like us, you are based in the UK! For our research study the variability in quality of the acquired images and frustration of weather conditions ruled this out pretty quickly, though we are thinking of revisiting this option this summer.
Next we turned to a Vivitar 285hv flash which we modified to full spectrum by removal of the fresnel lens. Thankfully youtube helped us out massively here, specifically the video below with full instructions. The modification isn’t trivial and we still struggled a bit with inconsistencies, reflection and shadows. After fighting with the flash for several months (we used the flash for all the images in our first publication on this work; here, but it was a pain!) we decided to try out alternative lighting rigs. Scroll down to below the videos for where we are now.
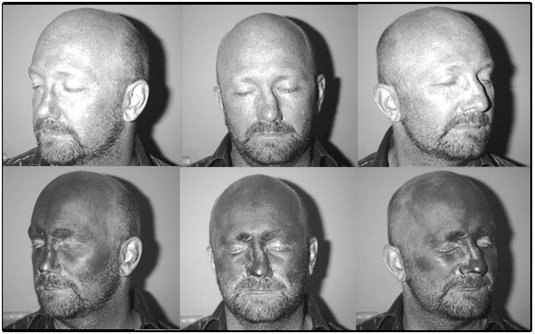
More out of hope than expectation I took a punt on getting 2 bars of LED blacklights: KAM-UV bar. These are actually surprisingly bright and deliver flat, consistent light. They work really well for us. You will still need long exposures (we usually use 0.8s with f stop at 3.5) and the lights get hot so when we are doing all day museum events we shut them off between people.


As you can see from the photos above, we mount the two lights vertically on photography tripods – you can pick these up pretty cheap – and then shoot against a light background. Other options would be to use conventional black light bulbs but we were pretty pleased with how the UV lights worked.

Other stuff
Really that’s all you need. Using a digital camera you can shoot to card or straight to the computer and apart from the long exposure times and focus challenges you should be good.
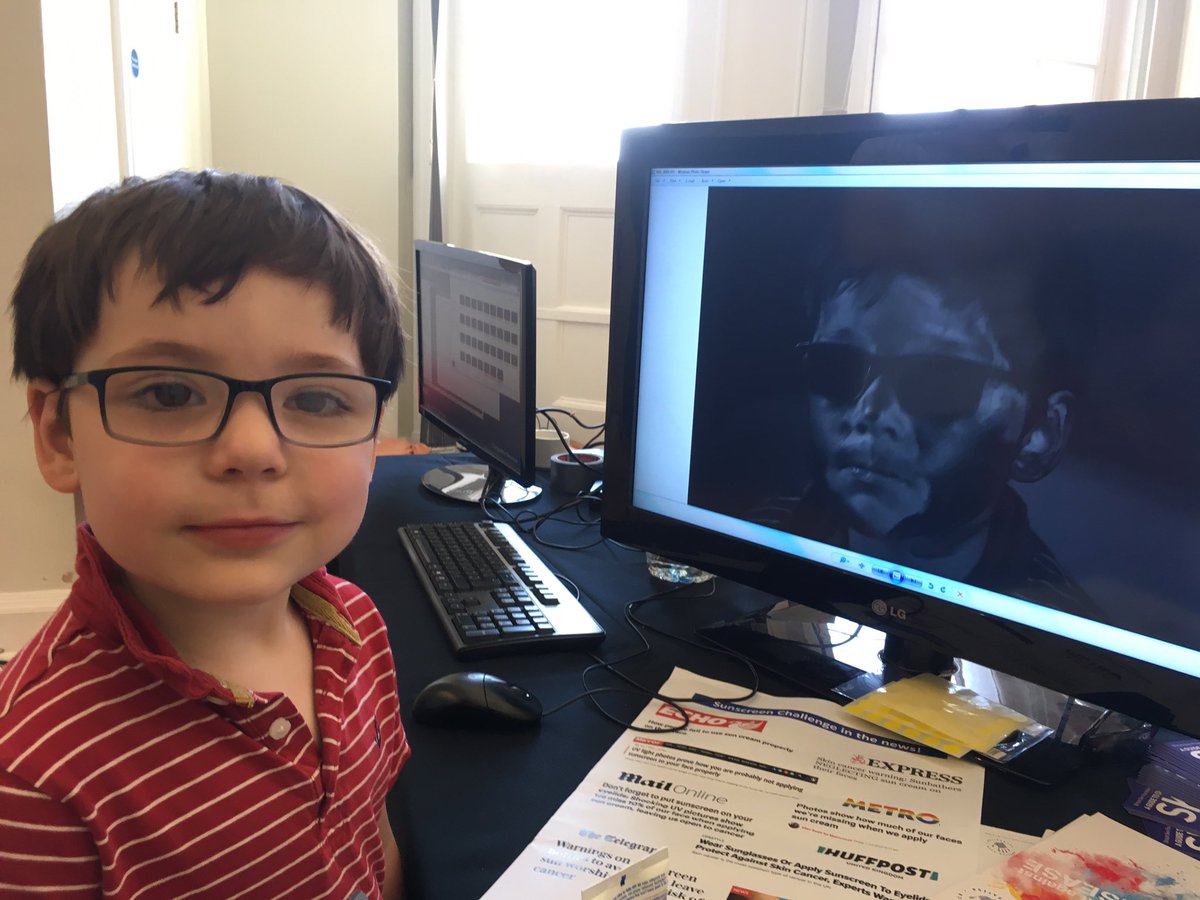
For our public outreach events we hook up our camera and computer to a big screen so we can display the images and discuss the implications with the public.
We also usually bring a small photo printer so kids can take their picture home with them.
For teachers/researchers who are considering this as a project I just want to say that I like photography but am by no means an expert so you should definitely not be put off by anything here. All things described are very doable for anyone and I have had 6 or 7 different students taking excellent photos with our final rig. Total cost by buying second-hand was ~£650 not including computer and monitor. If I was going to start over I would spend a little more on the camera body as our only real challenge now are associated with the old camera we started with.

For more info, comments (or any advice for us), fill out the form below. Similarly if you are in the Liverpool area and you want us to come to your school/group or whatever feel free to get in touch.
You can read about some of our research findings here


