
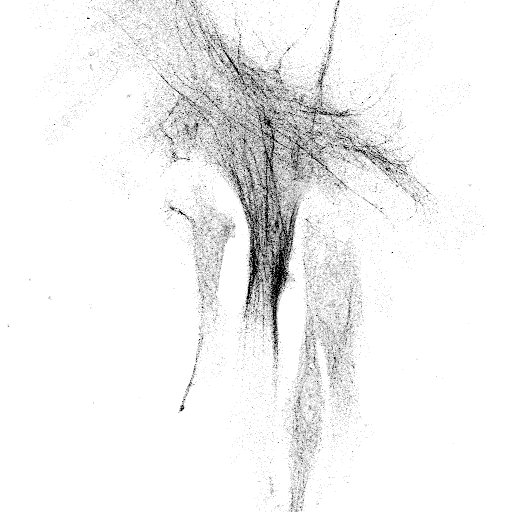
In the last few weeks Lee and I have spent a lot of time on microscopes imaging laminins and laminin-binding proteins in a variety of cellular contexts. These images are part of our research efforts, they tell us a story about our cells and allow us to answer questions. However, they are also pretty in their own right. Most of these won’t make it into papers and so I’d like to share them with a little description of what you are looking at.
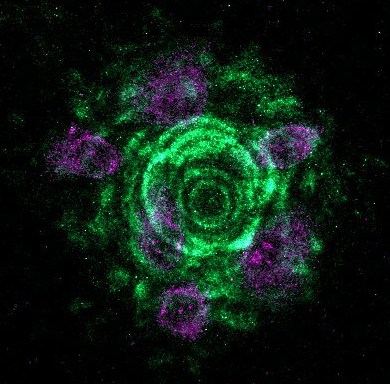
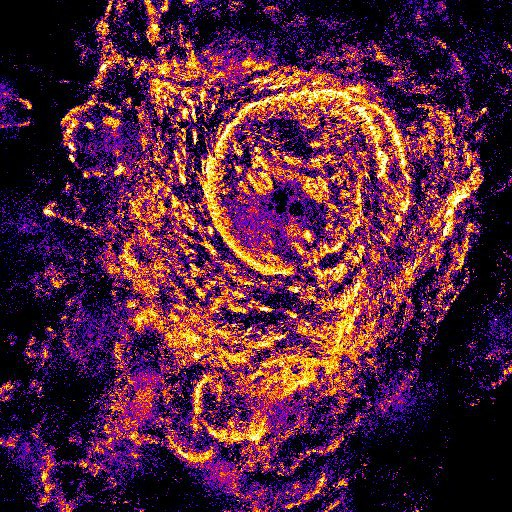
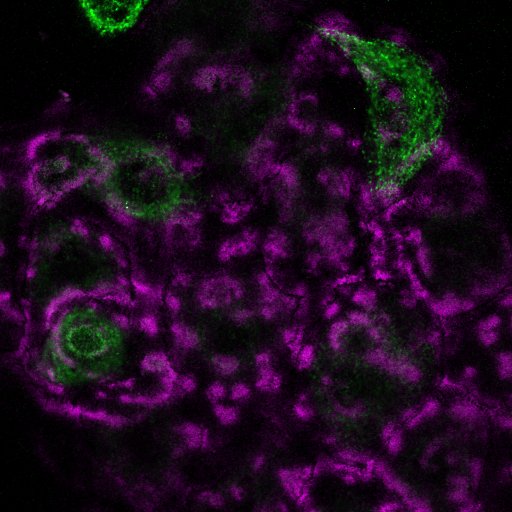

A few more that I like from the set

")
")
Want to know more about the science behind these pics?
We have an intro page talking more about laminins including some more staining images. Although these pics are cells in a dish, laminins are really important to holding tissues together. In tissues, laminins are found in structures termed basement membranes, the link will take you to our very friendly introduction to these structures.
How do we prepare the samples?
The images on this page were generated using a procedure called indirect immunofluorescence microscopy (IIF, or sometimes immunocytochemistry). Basically we have grown our cells on thin pieces of glass (coverslips) then used methanol to hold everything in place (to fix the cells) and to allow our antibodies to permeate the cells. We then have used antibodies that specifically recognise our protein of interest, washed off unbound antibodies then used a second antibody that recognises the first antibody. The secondary antibody has a fluorescent tag attached to it which we then use the microscope to visualise (hence IIF comes from “indirect” = via the secondary antibody, immuno = using an antibody, fluorescence = the antibody has a fluorescent dye). For the imaging, we have shone laser light onto our slide and wherever the secondary antibody is we excite the fluorescent dye which gives off light which we can capture on the microscope camera. Here we have used a laser scanning confocal microscope.
All that may have sounded complicated but it’s a really common, widely used technique and quite simple really! The hardest parts are making the primary antibodies, the ones that recognise the protein that you care about, and then working out the best way to use those antibodies (what dilution, what fix, what permeabilization chemistry etc). All antibodies are imperfect, so if you use too high a concentration you will get signal that isn’t real but if you use too low you may not get any signal that you can detect. So, although it only takes a few hours to process everything and then a couple of hours to image the slides, it might have taken a few weeks or months to get the conditions nailed down for how best to do it and to work out what is real and what is artefactual.
Fluorescence microscopy is still my favourite thing to do in the lab. I now have a team of scientists working with me and in addition to supervising them, I have teaching and administration commitments as well as grant and manuscript writing to do. The practical upshot of this is that I don’t get the chance to enter the lab as much as I would like. However, whenever there is a chance for some ‘scope time I am always happy. Plus, while there are caveats and limitations to these techniques, but you can often learn a lot by looking!
Like this?
You might enjoy our previous “You can see a lot by looking” post on live-TIRF microscopy
Our next post in this series will probably be about tissue staining…sign up for updates via the follow button

3 Comments